I've been wanting to make my own headboard for about a year now. I
saw a few posts on Pinterest that sparked my curiosity and my creativity
and so I decided a headboard would be one of my first projects when we
eventually moved into our own home.
Jordan's dad is a
really talented wood worker and so I decided to talk to him about
different headboard designs and the like. Apparently my desire and drive
to make a headboard gushed out when I spoke with him because for
Christmas Jordan's parents so generously gave us the gift of a
headboard...well more specifically, they offered to pay for the
materials to make a headboard!! I was over the moon excited and could
not WAIT to get started, but first I had to do all the research, all the
math, cost analysis, and everything like that. Now, I am in no way,
shape, or form a professional or even an
amateur at
re-upholstery. Yes, I do work at JoAnn's and have consulted on many
projects, but this was my first big project and it really was a group
effort to get it done. **Shout out to my patient husband and fantastic
father-in-law.** In my opinion, there isn't a right or wrong way to do a
project like this, as long as
you like the end product.
These are the steps we took to achieve our beautiful headboard:
Step 1: Planning, planning, planning!
This
was the step that honestly took me the longest (when it comes to "big
and important" projects..I'm kind of indecisive). The most basic
starting step is to figure out what you want your headboard to look
like, see figure below.
Theses
are just a few examples of what you could do. Originally I loved the
Portman style, but ended up nixing that and going with the Cleveland
shape.
Once you have your shape picked out, the real
planning begins. I researched the process of making a headboard from
scratch for hours upon hours and could not for the life of me find any
measurements for a king-sized mattress, so I had to come up with them on
my own. I'm not going to post a picture of what my "plans" looked like
because looking back at them, I can hardly make sense of them...I blame
it on my pregnancy mind then!
Anyways, measurements for
my headboard for my king-size bed: 79" long by 57" tall (at the tallest
point, which was the middle hump). These measurements allowed for the
actual headboard to be about 79" long by 42". On each side of the
mattress there is a 3" overhang. More on the details and construction
later.
If you don't have a king-sized bed or you think
this might be too big for what you are wanting to do, then you'll need
to do a little math and figure out the measurements you'd prefer. This
is a good launching point for you though! After you figure out your
measurements, you'll need to plan out materials and how much of each
material you'll need. While researching I came across several tutorials
(I'll post the ones I found most helpful at the end of this post) with
lots of different materials you
could use. You just have to find what you're willing to spend and work around that.
The materials I used were:
- 2 sheets of plywood (4' X 8') - ~$15
- 2 metal brackets - $1.00
- a box of screws - $5.00
- a staple gun (if you don't already have one you can pick one up and a box of a bazillion staples for no more than $30)
- 4 yards foam padding - $30.00
- 2 yards batting - already had on hand
- 2 yards 90" muslin - $6.00
- 3 yards fabric - $60.00
- 1 spool nail head trim - $10.00
- spray adhesive - already had on hand
Now,
when I purchased this stuff it was either on sale or I used a coupon to
discount it. I also work at JoAnn's and so I had my employee discount,
but you can keep a look out for transaction discounts that would give
you the same discount or even a little bit better discount on the entire
transaction (assuming you are shopping at JoAnn's!). If you aren't in
any type of rush, you can slowly gather the items you need based on when
the best coupons come out...just an idea!
Step 2: Construction
Jordan
and my father-in-law did a ton of this work...I was mostly just the
"foreman" overlooking the project and making sure there was no slacking
off! ;)
Once you have figured out the shape and size you want your headboard to be you will want to make a template for the top.
Take a big piece of cardboard and draw the left
half
of your top. As you can tell, I had to go at it a few times to get it
how I wanted it. When you are happy with the shape, cut out your
template.
After
your template is cut out you will find the middle point of your plywood
(or middle point of your headboard measurement), lay down your
template, draw your shape, then flip your piece of cardboard over and
draw the right side of your headboard. Doing this insures that you have
the exact same shape on the left and the right side of your headboard. I
don't know about you, but if I free handed the entire length of the
template I would have one severely wonky looking top curve!
If
you squint, you can see where we traced our template onto our plywood.
It's there, I promise! After you have traced your template on, cut the
wood!
Once we cut out the main body of our headboard we needed to add the border (for the nail head trim to nail into) and the legs.
To
make the legs, we cut pieces of wood, 4" wide, and set them up flush
against the bottom of the headboard, took our metal brackets, and
screwed the main body and the short little legs together on the
back.
We knew that those little leggies would not hold the heavy body of the
headboard so we used another set of boards, again cut 4" wide, to
reinforce the legs AND also create the frame for the trim to eventually
go in.
We used a boatload of screws...can ya tell?
The tops of the reinforcing wood needed to be shaved down to size.
I
didn't get a ton of pictures of us creating the frame because believe
you me...it was an ordeal. Between Jordan's dad, Jordan, and myself we
were able to create the rest of the frame for the body of the headboard.
It didn't turn out perfectly symmetrical in some spots, but it didn't
need to be because we still had to cover it and I knew that all the
layers of fabric would muffle the small mistakes in the wood. Really the only important thing here is that our frame was 4" wide all the way around the headboard.
Why did you put a frame on the headboard? Well, I knew I wanted trim. In
my opinion it really makes a headboard look polished and nicely
finishes it off. If you don't think you want to bother with nail head
trim then there is no need to bother with a frame. Why a 4" frame? I planned on nailing in trim 3" in and wanted to give myself plenty of wiggle room.

Jordan screwing in the final screws...mainly because I couldn't get all the way down on the ground in my pregnant condition. ;)
The headboard body complete, just some minor sanding to make the shape nice and smooth.
Step 3: Covering the darn thing with fabric
Alright,
deep breath! We've got the "construction" of the headboard complete!
Yahoo! Now we need to get it covered and looking good.
The
first step is to go fabric shopping! For us, this was much easier said
than done...if you know what I mean ladies... **A quick note: when you
are shopping for the fabric and there is a pattern on it, you want to make sure the pattern is railroaded. Railroaded means the pattern repeats horizontally not vertically. If the pattern repeats vertically you will most likely not be able to use it for your headboard. See below.**
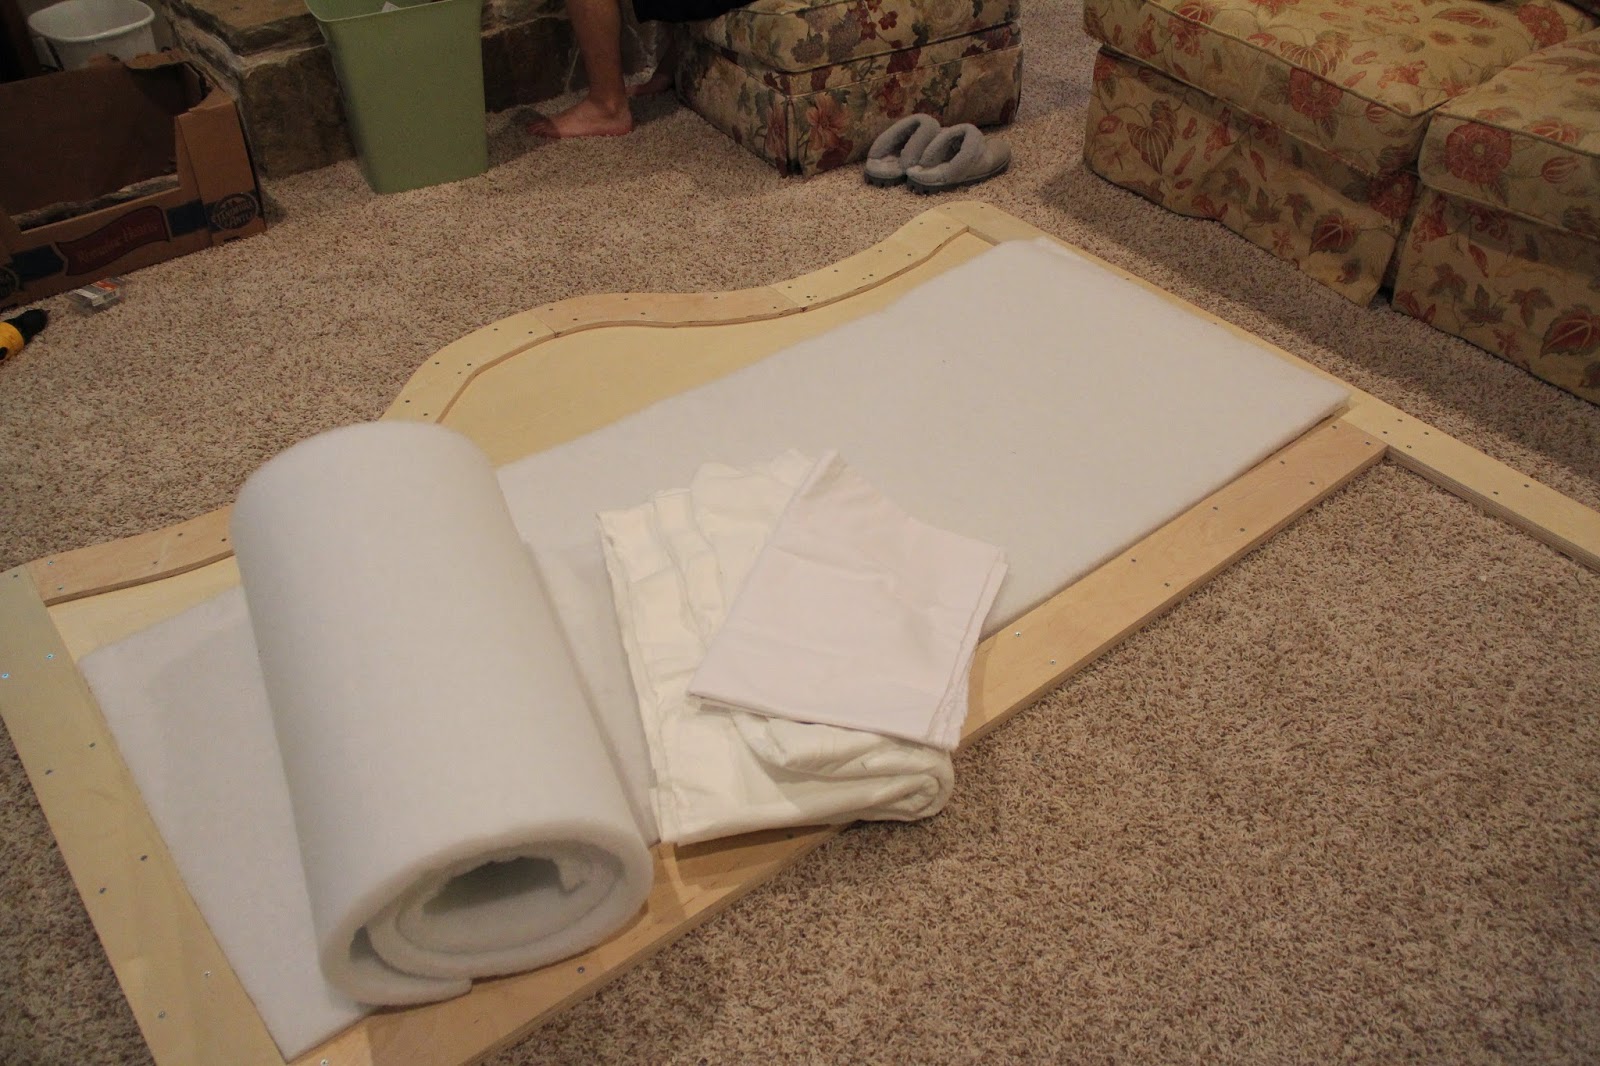
When
you go to the fabric store you will need to get more than just the
pretty fabric...you'll need to get the guts of it all, aka the foam
padding, the batting, and the muslin (optional).
Here are the guts.
When
shopping for your foam padding I have a couple words to the wise. More
than likely you will have a couple options as to the product you'll buy.
Option one is a high density foam, as seen
here. This foam comes in varying thicknesses, is very cushy, and tends to be on the expensive side. Option two is a product called
NuFoam.
It looks like really really thick batting but it is considered a foam/
It also comes in varying thicknesses, and is cushy, but it is a much
cheaper alternative to the high density stuff. I didn't feel like our
headboard needed the ultra cushy high density foam so Jordan and I went
with the NuFoam. I would encourage you to go to your local craft/fabric
store and feel the difference for yourself.
Next
on your list is the batting and the muslin. The purpose of the batting
is 1) to give your headboard just a teensy bit more cushion, 2) to put a
layer in between your pretty fabric and the wood of the headboard, and
3) to smooth or blur your foam so you don't have any hard lines in the
finished product. I had all my batting on hand so I didn't need to
purchase any, but I do have some suggestions. In my opinion the
prepackaged batting is the best/cheapest way to go. Take the
measurements of your headboard and add about 4"-6" to the width and the
length (this ensures that you have enough to wrap around the
bottom/sides/top and still have plenty of room to staple the material to
the back) and you'll have the measurements you need to get close to in
your prepackaged batting. I would recommend something like
this or
this...again
people, personal preference! Or if you really want to, you can purchase
it by the yard if none of the prepackaged stuff fits your measurements.
(No need to overbuy anything!) Another item you need is muslin. Muslin
is just a basic cotton fabric. The muslin is going to go right over top
of your batting. Why muslin? We chose to use the muslin because we were
really able to smooth everything out and staple and unstaple the batting
and the muslin to make sure we didn't have any bubbles or lumps
before we put on the expensive fabric. It is like putting primer on before you actually paint the walls.
Alright, so now that you have your materials, now it is time to get your staple gun out and go. to town.
Cut your foam to fit inside your
frame. Lift your foam out of the frame, grab your can of spray
adhesive, and spray, spray, spray where your foam was. Reposition foam
inside the frame. Now your foam should be secured to the wood and ready
to be covered.
Put your batting on. We found it easiest to lay your batting on the floor and place your headboard on top of it. Staple the sides and stand up. If you are doing anything other than a square you'll
need to
stand your headboard up so you can get a good look at the way the
fabric is laying around the curves. Make sure your batting is nice and
tight!
In
order to avoid puckering, bumps, and bubbles, we mangled the batting
and muslin on the back. Cutting the strips like that really
helped...there is no way we could have gotten as smooth of a look as we
did without manhandling that stuff! Meh...no one sees it and at the end
you cut all those tails off anyway.
Put your muslin on using the same process as before. Make sure your muslin is nice and tight!
Now for the important part...the pretty fabric!
As
you can see here, we fut a few staples in the sides, but not the top
and bottom to make sure when we pulled the fabric nice and tight on the
top and bottom that it wouldn't jack with the straightness (is that a
word?) of the pattern. You'll want to be vigilant of this throughout the
tugging and pulling and stapling process!
Almost done! Only trim left to put on!!
If
you like the look of trim there are two ways to do it: the easy way and
the hard way. The easy way is by purchasing a spool of
nailhead trim. The hard way is by purchasing 5 gazillion individual
tacks
and hammering them in one by stinking one. I said phoowee to the
individual tacks and went with the spool of nailhead trim. With the
spool you're only nailing in one tack every five spots or so and the
finished product looks just as great as individual tacks taking up only a
fraction of the time. Plus, when using individual tacks there is a
higher margin of crookedness. At any rate, you'll want to pull your
ruler out and really make sure that you are consistent with the width
you are using. Since my wooden frame was 4" thick, I put my trim 3" in
from the side. If you really want to, and I did do this because I'm so
anal, you can use tailor's chalk to mark on your fabric where your nails
need to go.
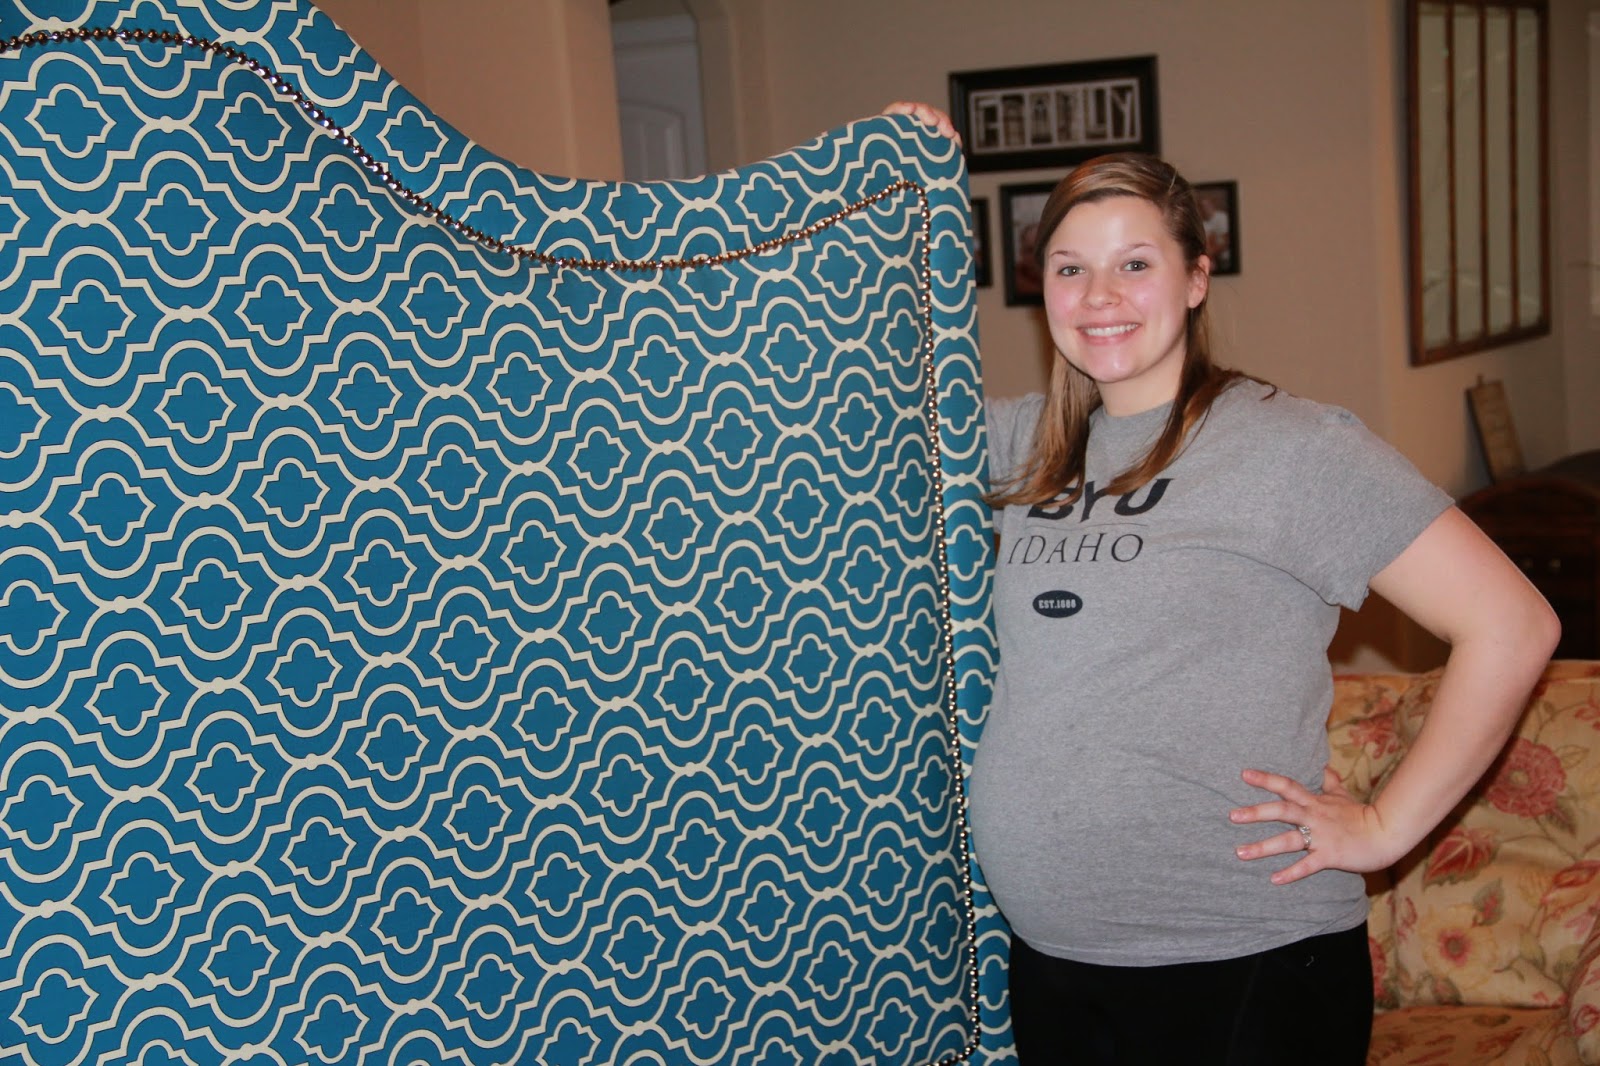
Voila!
And there you have it people! Our finished and quite beautiful product!
My
parting words would be these, as with any project big or small, make
sure to do your research, plan, but most of all have fun creating!
As promised, here are a few sites that I found helpful and informative.